Wednesday, January 29, 2014

Screen Printing on Paper for Custom Wall Art

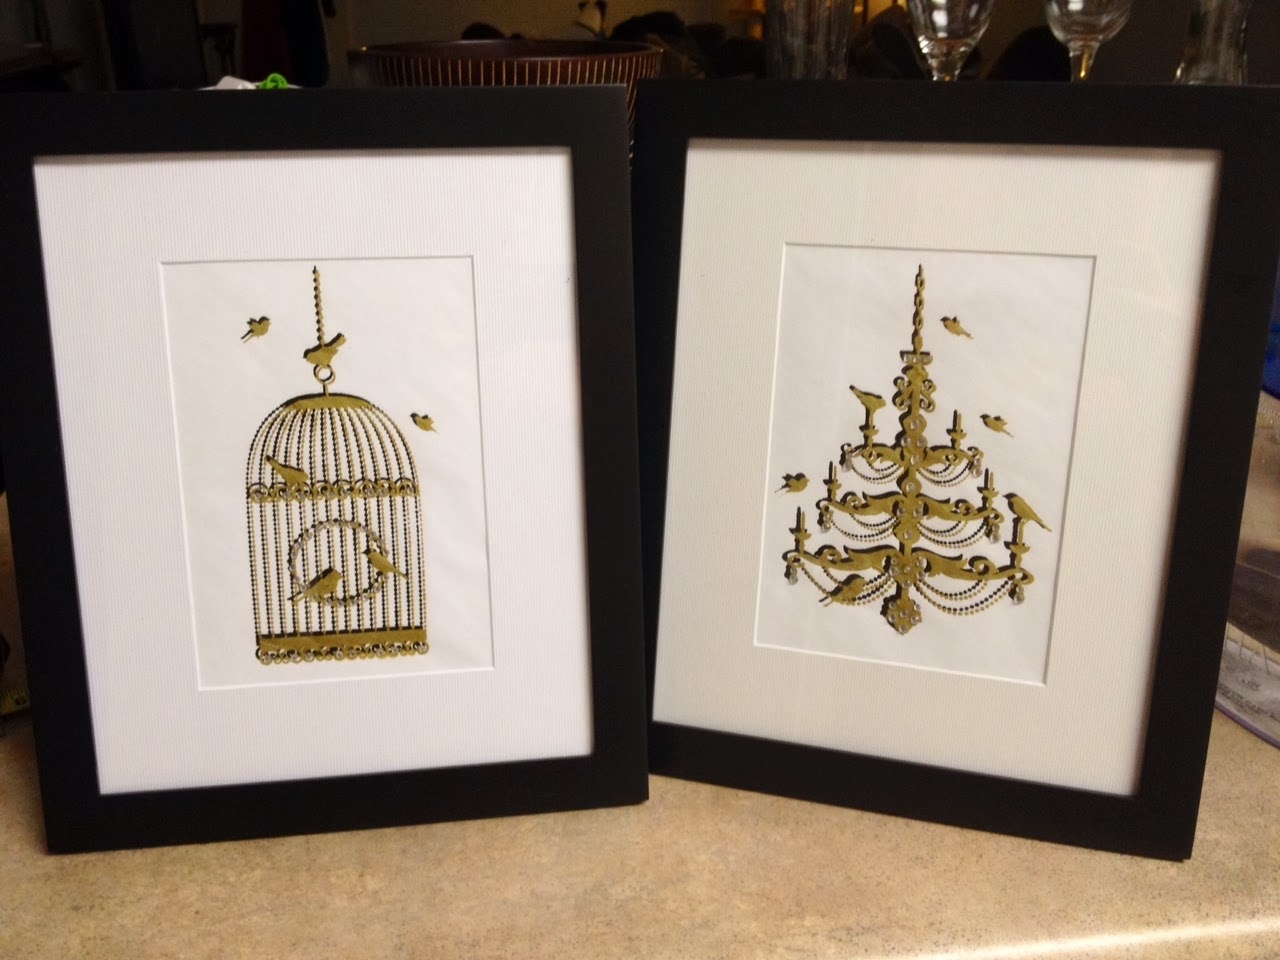
I love the look of wall decor to cover up bare and boring white walls. I searched online for items to purchase but it was either too expensive, or not exactly what I wanted. Randomly I came across these beautiful birdcage and chandelier designs and thought, why not make my OWN wall decor? I typically use EZScreenPrint stencils for t-shirts, but I decided to I was going to expand my medium.


Step 1 - I purchased two pieces of water color paper (regular printer paper gets too wrinkly with screen printing ink) and made my stencils with the EZScreenPrint starter kit. You can view the How-To video here: How-To Make a Screen Printing Stencil

Step 2 - I picked out my two colors, Speedball black fabric ink and Speedball opaque gold fabric ink. I screen printed the black ink first, and allowed it to fully dry. View the How-To video here: How-To Screen Print a T-Shirt. You can also speed up the process by using a blow dryer. Once the first color was dry, I repositioned the stencil on the paper, bringing it down slightly, and screen printed the opaque gold ink.


Step 3 - Once both colors were dry, I embellished them with rhinestones. I purchased two 5"x7" frames and now have these beautiful pieces hanging on my wall. Not only were they easy to make, but much cheaper than anything I could find in stores or online, plus I have a sense of gratification for making them myself!


"Like" EZScreenPrint on Facebook for more photos, information, and discounts!
https://www.facebook.com/pages/EZScreenPrint/188961577753?ref=hl

Monday, January 6, 2014

Joan’s Valentines Day Creations


Valentine’s Day is right around the corner! Create personalized and creative valentine’s day gifts and decorations with EZScreenPrint stencils! View Joan’s blog for her full craft project: http://expressyourcreativity.blogspot.com/

EZScreenPrint products can be found here: http://ezscreenprint.com


How-To Print a Two Color Application


slo-tee1_600

Random fact about me: I’m in a Subaru owners car group based in the city San Luis Obispo, CA. Recently, a few of the members asked me to make t-shirts with our groups logo “SLObaru” for a Subaru event in southern California. I used a two color application process that’s actually much easier to do than it sounds, and whether you are in a car group yourself or just have a design with multiple colors, this process can work for you.
slobaru_bw2

First, I started with my artwork (pictured above) and printed it off on my ink jet printer onto ink jet transparency. It is important that the design be as opaque as possible, as it will result in a high quality stencil. Using the EZScreenPrint basic starter kit materials, I exposed my silk screen stencil for one minute in direct sunlight using my artwork. After letting it soak and rinse out following the instructions found in the kit or video found at this link: http://www.youtube.com/watch?v=SU8V_ePdXtk  I was ready to start screen printing my t-shirts.
flomagenta_200

When following a two color application process, the first step is to block off a portion of the stencil that will be the secondary color. I found using blue painters tape is the easiest solution for this step. For my design, I put painters tape over the portion of the stencil that reads “baru.” I found a Speedball screen printing ink that closely matched the STi “Cherry Blossom Red” which is called, Florescent Magenta. I placed the stencil over my white t-shirt, and using the squeegee provided in the screen print kit, I pressed the ink over the stencil. I lifted the stencil and brought it down over the next t-shirt, and repeated the process until all my t-shirts had the pink “SLO” screen printed on the front.
speedblack_200

Once I allowed enough time for the ink to dry, I removed the tape from the “baru” and placed new tape over the letters “SLO” on my stencil. I repeated the same process as before except I used the black Speedball screen printing ink. After all my shirts had the secondary color, I allowed it to air dry then heat set each shirt with an iron.

slo-tee2
Sloane wearing the SLObaru t-shirt made with EZScreenPrint silk screen stencils

My friends were thrilled to see the finished results and were extremely impressed with how professional the t-shirts looked without having to pay professional prices.

Easy Way to Screen Print a Custom T-Shirt - EZScreenPrint Step 2


Easy do-it-yourself screen printing on t-shirts using EZScreenPrint silk screen materials.

Easy Way to Screen Print at Home - EZScreenPrint Step 1


The first step to creating a screen printing stencil with EZScreenPrint basic silk screen starter kit.